IMPORT THE DATA DATA FROM QUICK BOOKS TO BUSINESS SYSTEM PLUS PC APPLICATION
- Export data from QUICK BOOKS accounting system into Excel files
You can import the following data- Customers
- Vendors
- Inventory
- Accounts
- Process CSV file (if needed)
- Save all your Excel files in CSV format
- Import the data from CSV files into BUSINESS SYSTEM PLUS system
- Specify which fields in your file correspond to the data in BUSINESS SYSTEM PLUS system:
select the appropriate fields in the Combo Box on the Import Form.
If you select an empty field, the particular data from the CSV file will not be imported.
Note: Some entries in the system (e.g customer name) are mandatory, these entries must be selected. In case if you did not, the system will prompt that the field is mandatory.
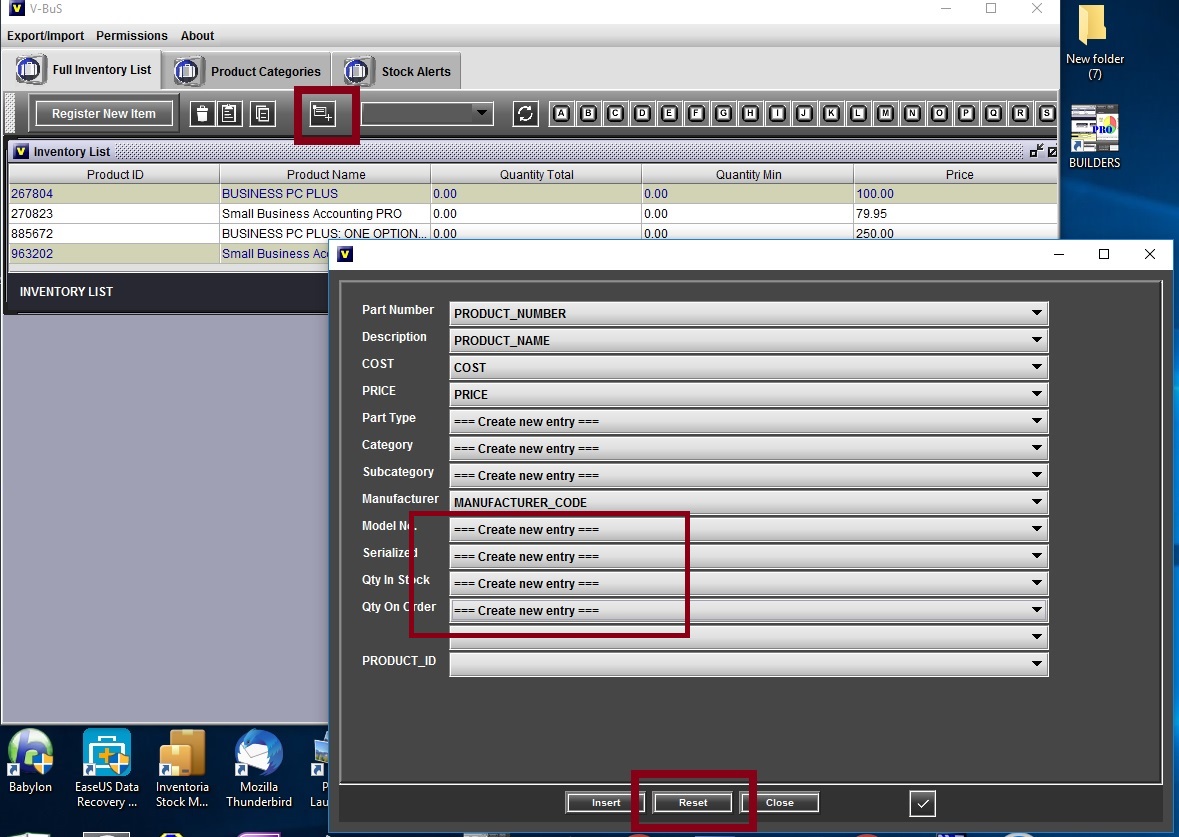
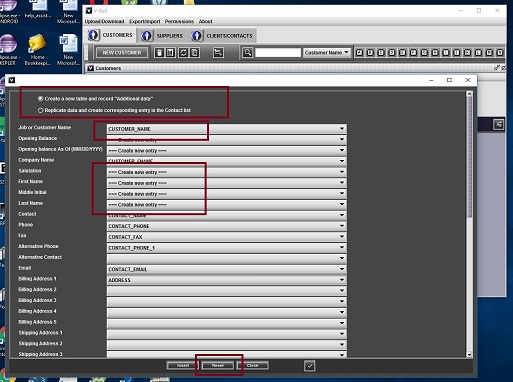
Note: The system allows the user to pre-select or re-set all the fields (and then select them one by one), by pressing the "Tick" button on the bottom of the import form. - If you can't find the appropriate entry, in the case of inventory or customers (vendors),
you can create a new table in our system and import the data into it.
Select "Create new entry" opposite the appropriate label and press "RESET" the new table for "Additional data" will be created. The data from the CSV file will be imported into the existing table and "Additional data" table.
-
Note: To create invoices, you need to specify product prices. In case if your data contains only standard cost, you can specify the prices of based on their costs of products when the data is already imported into the system
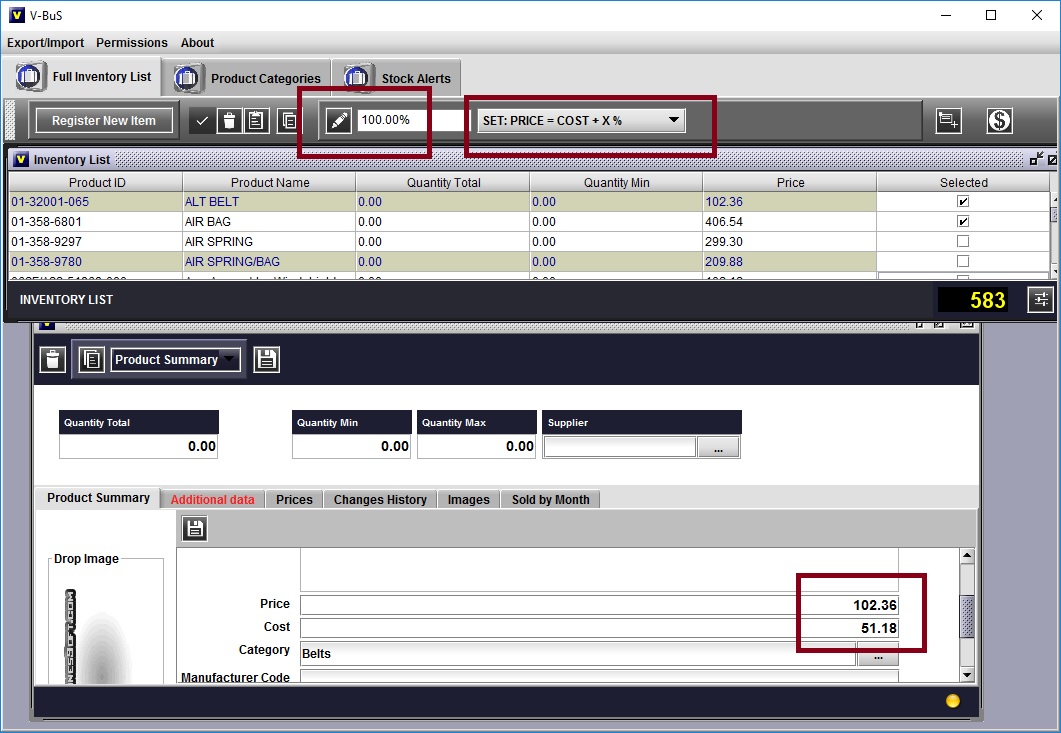
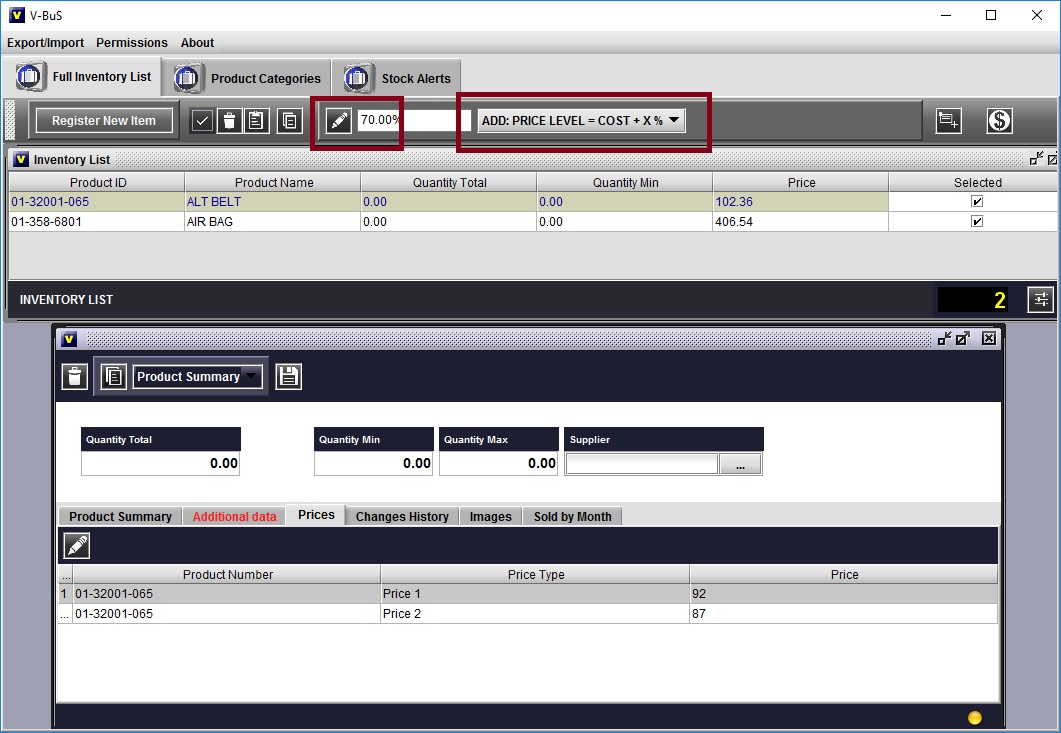
You can also specify multiple prices for each product for subsequent use in the invoices
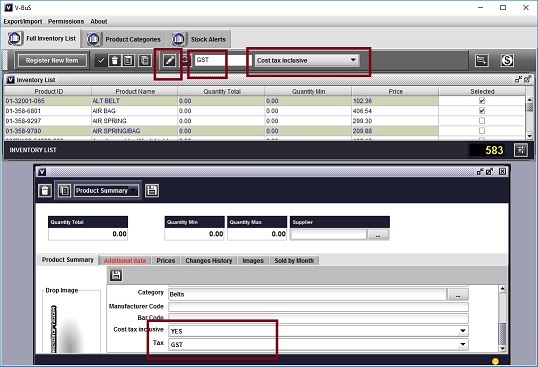
Finally, you will need to specify that the cost, which will be used as purchase price, includes GST (if it does). You can also do it when the data is already imported into the system
Note If you press "INSERT" the data only will be inserted into existing tables. The "Additional data" table will not be created.
- In the case of customers (vendors), you can create records both in customers and contacts tables.
This can be useful if you want to have a separate list to send automatic multiple emails to your customers or vendors.
In this case, you need to check "Replicate data and create a corresponding entry in the Contact list" on the import form when import customers or vendors.
- Specify which fields in your file correspond to the data in BUSINESS SYSTEM PLUS system:
select the appropriate fields in the Combo Box on the Import Form.
- Apart from the data above you can import many other types of data e.g the list of sales imported from your merchant account or PayPal site.
The process is similar.
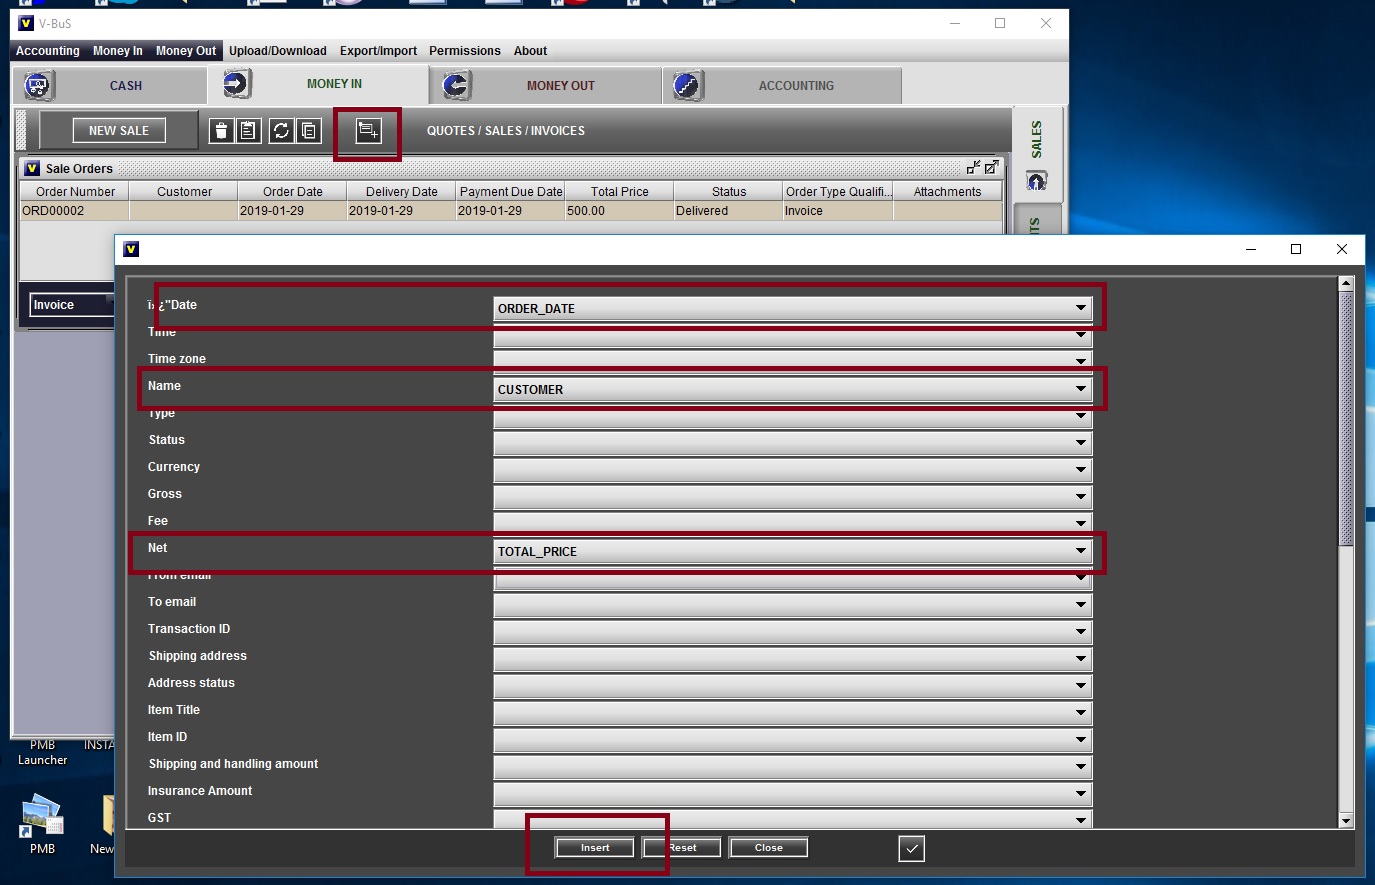
Note: In case of importing sales, you need to select ORDER_DATE, TOTAL_PRICE, and CUSTOMER, which are specified as mandatory fields in the system and should be mapped to the entries in the CSV file.
The system inserts the sales data, creates all appropriate transactions in General Ledger and modifies the accounts balances. So that if you import several hundred sale records, the procedure can be relatively slow. Note: In case of importing accounts, you need to select and map CLASSIFICATION to the account type (which is a Credit card, Bank account, Long term asset, etc.);
The field BANK ACC NO/CREDIT CARD NO. in the CSV file should be mapped to ACCOUNT_LINKRD entry in the system

This will give the system an instruction to create a special Bank Account record with the given account number, to which you can deposit and withdraw.
- When the data is imported: all your customers, vendors and inventory items inserted into the system, the account balances set, you can start using the system in your business. Create and send quotes and invoices to your customers, register purchase orders, control inventory amounts etc.
- If the Android device is connected, upload the inventory and contact data from the PC application to the Android application (Press "Double arrow" icon on Inventory and Contact lists and select "FULL RESTORE from V-Business PC").
| DOWNLOAD | FAQ | CONTACT |